By the end of this chapter, you should be able to:
4.Identify the correct order of draw for venipuncture and the additive in each tube.
5.Differentiate between venipuncture, capillary puncture, and blood culture collection protocols.
6.Apply standard precautions and OSHA Bloodborne Pathogens Standard requirements during all specimen collection.
7.Select the correct needle gauge, tube, and site for common blood collection scenarios.
8.Recognize complications of phlebotomy (hematoma, hemolysis, syncope) and the appropriate response.
9.Correctly label, handle, and transport specimens per CLIA waived testing and HIPAA Privacy Rule requirements.
10.Identify patient preparation, contraindications, and post-procedure care for phlebotomy.
1.1 Role of the Medical Assistant in Phlebotomy
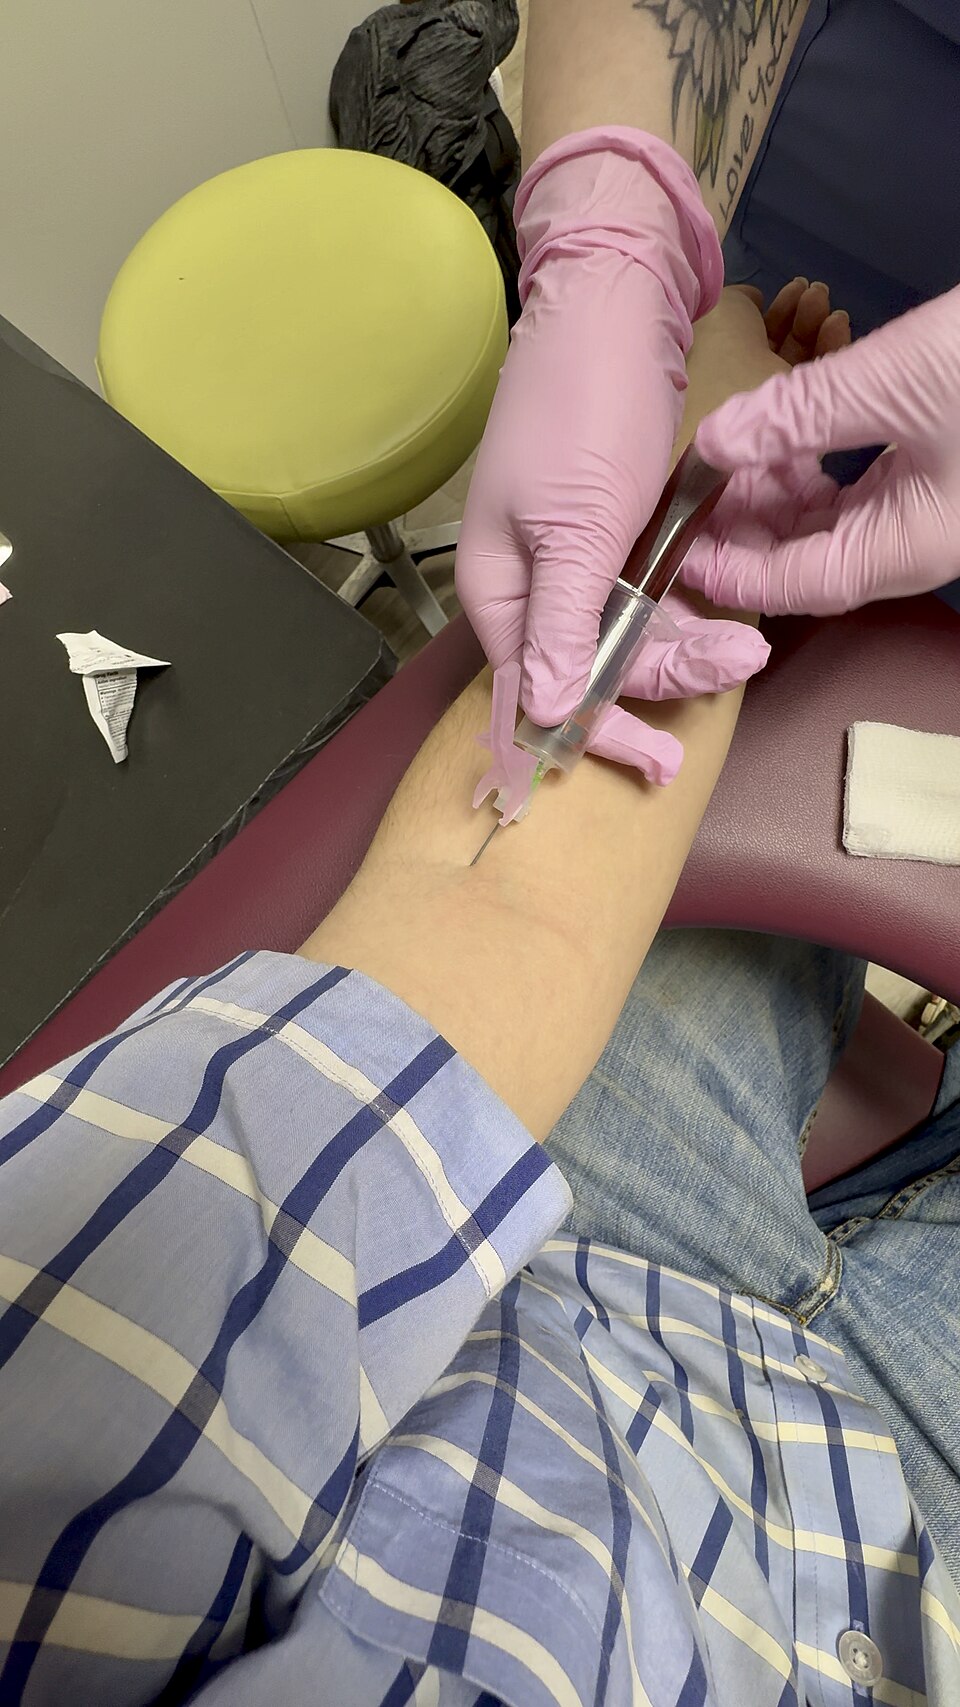
The medical assistant (MA) performs phlebotomy in outpatient clinics, physician offices, and urgent care settings. This is a CLIA waived procedure when performed with approved devices and following manufacturer instructions. The MA must verify the patient's identity using two patient identifiers (e.g., full name and date of birth, or name and medical record number) before any puncture. The MA is also responsible for:
Explaining the procedure to reduce patient anxiety.
Confirming the correct test and fasting status.
Selecting the appropriate equipment.
Performing the collection safely.
Labeling tubes at the bedside immediately after collection.
Documenting the procedure in the electronic health record (EHR) per the HIPAA Privacy Rule (minimum necessary information).
1.2 Standard Precautions and OSHA Bloodborne Pathogens Standard
All phlebotomy procedures fall under the OSHA Bloodborne Pathogens Standard and CDC Standard Precautions. Key requirements:
Hand hygiene: Wash hands with soap and water or use alcohol-based hand rub before and after every patient contact, even if gloves are worn.
Gloves: Wear clean, non-sterile gloves for every venipuncture and capillary puncture. Change gloves between patients.
Sharps safety: Never recap, bend, or break needles. Dispose of needles immediately into a puncture-resistant sharps container located at the point of use.
Personal protective equipment (PPE): Use gloves, and add a face shield or goggles if splash risk exists.
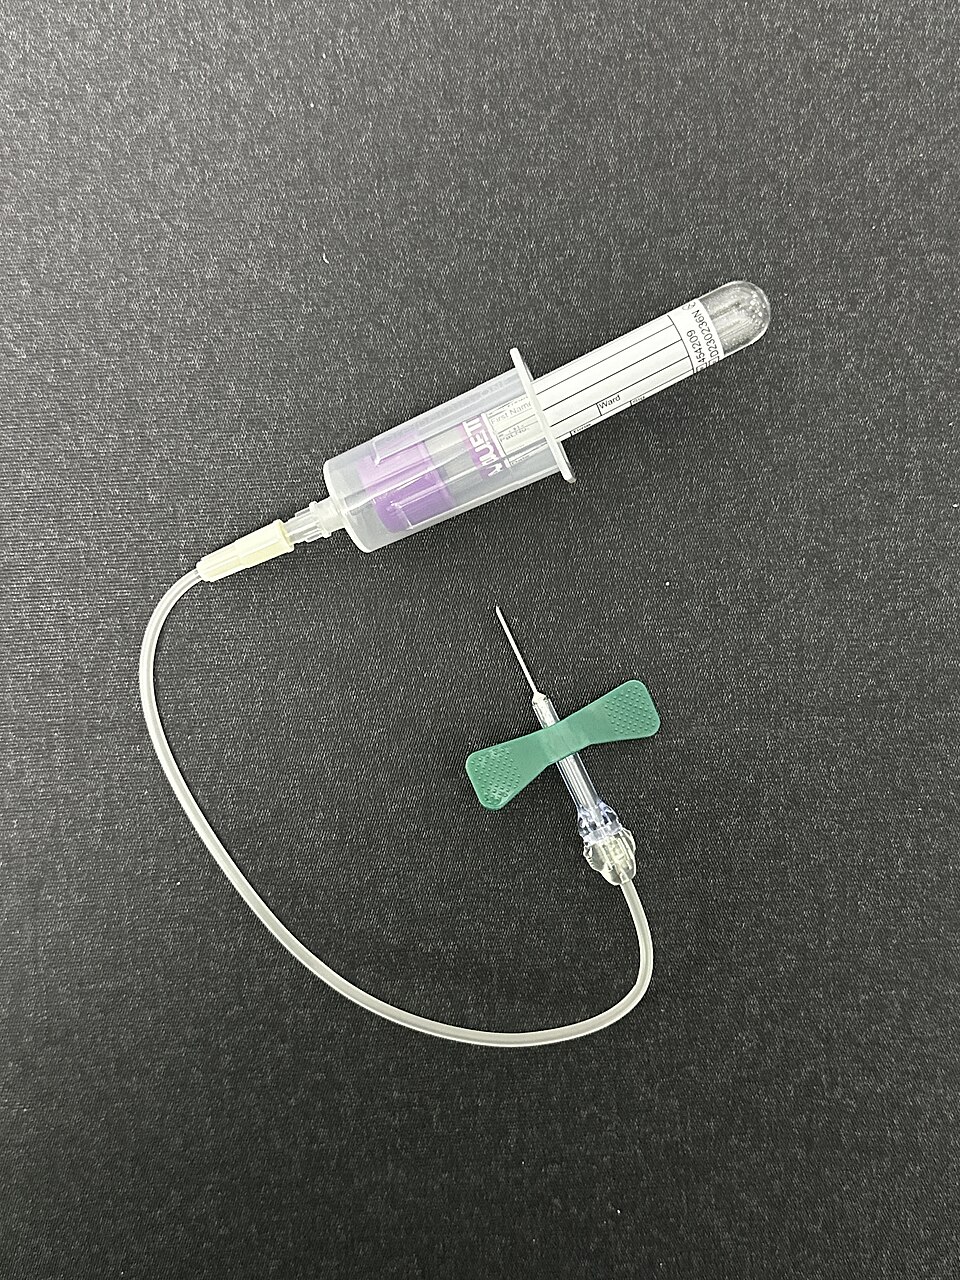
Work practice controls: Use a safety-engineered device (e.g., retractable needle, butterfly with safety shield). Activate the safety feature immediately after withdrawal.
Exposure incident: If a needlestick or splash occurs, wash the area with soap and water (or flush mucous membranes with water), report to the supervisor, and seek medical evaluation per facility policy.
Never perform phlebotomy without gloves. Never eat, drink, or apply cosmetics in the collection area.
21-gauge: Standard for most adult venipuncture (good flow, minimal hemolysis).
22-gauge: For small or fragile veins (older adults, children).
23-gauge: Butterfly needle; used for difficult veins, pediatric, or geriatric patients. Slower flow, higher hemolysis risk if vacuum is too strong.
Needle length: 1 to 1.5 inches for adults; shorter for pediatric.
Syringe: Use when veins are fragile or when vacuum tubes may collapse the vein. Maximum volume 10–20 mL. Transfer blood gently into tubes using a blood transfer device to avoid hemolysis.
Evacuated Tube System (ETS)
The ETS consists of a double-ended needle, a holder (adapter), and evacuated tubes. The tube's vacuum draws blood. If the tube is expired, underfilled, or overfilled, results may be invalid.
Additives and Tube Color (Order of Draw)
The order of draw prevents cross-contamination of additives. Memorize this sequence:
43.Blood culture bottles (yellow or blood culture media) – sterile, no additive.
44.Light blue – Sodium citrate (coagulation tests, PT/INR, aPTT). Tube must be filled completely to maintain 9:1 blood-to-anticoagulant ratio.
45.Red (plain or serum) – No additive or clot activator. Used for serum chemistry, serology, blood bank.
46.Gold or tiger-top (SST) – Serum separator gel with clot activator. Used for most routine chemistry.
47.Light green (PST) – Plasma separator tube with lithium heparin and gel. Used for plasma chemistry.
48.Dark green – Sodium or lithium heparin. Used for ammonia, electrolytes, or stat chemistry.
50.Gray – Sodium fluoride (glycolytic inhibitor) and potassium oxalate. Used for glucose, lactate, blood alcohol.
51.Royal blue – Trace elements (lead, copper, zinc). May contain EDTA or heparin.
Inversion: Gently invert tubes 5–10 times immediately after collection to mix additive with blood. Do not shake – shaking causes hemolysis.
1.4 Venipuncture Procedure
Patient Preparation
Verify the test requires fasting (usually 8–12 hours for glucose, lipids). Ask the patient when they last ate or drank.
Confirm the patient is not on anticoagulant therapy if coagulation tests are ordered (note it, but still collect).
Position the patient in a reclining chair or lying down to prevent falls if syncope occurs.
Site Selection
Use the antecubital fossa (inner elbow). Preferred veins in order:
61.Median cubital vein – largest, most stable, least painful.
62.Cephalic vein – lateral, may roll.
63.Basilic vein – medial, close to brachial artery and nerves (higher risk).
Do NOT use: An arm with an IV line, a fistula or graft, an arm on the same side as a mastectomy (lymphedema risk), an edematous arm, a bruised area, or a site above an IV site.
Apply a tourniquet 3–4 inches above the site. It should be tight enough to occlude venous flow but not arterial flow (palpable radial pulse). Leave on no longer than 1 minute to prevent hemoconcentration and altered test results.
Steps
67.Perform hand hygiene; apply gloves.
68.Clean the site with 70% isopropyl alcohol using a circular motion from the center outward. Allow to air dry (do not blow or fan).
69.Anchor the vein with your thumb 1–2 inches below the puncture site.
70.Insert the needle at a 15–30 degree angle with the bevel up, in the direction of the vein.
71.When blood flashes into the hub, advance slightly, then insert the tube into the holder.
72.Fill tubes in the correct order of draw. Remove the tourniquet as soon as blood flows (or after the first tube).
73.Place gauze over the puncture site, withdraw the needle, and activate the safety device.
74.Apply firm pressure for 2–3 minutes (longer if patient is on anticoagulants). Do not bend the arm – this causes hematoma.
75.Label tubes at the bedside. Dispose of the needle immediately.
1.5 Capillary Puncture (Microcollection)
Used for infants (<1 year), toddlers, patients with difficult veins, or for tests requiring small volumes (glucose, hemoglobin, newborn screening).
Sites:
Adults/children >1 year: Distal phalanges of the middle or ring finger (side of the fingertip, not the pad).
Infants <1 year: Medial or lateral heel (not the center of the heel, to avoid bone injury).
Do NOT use: The earlobe (except for specific tests), the thumb or index finger (calloused), or a finger that is cold, cyanotic, edematous, or previously punctured.
Procedure:
84.Warm the site with a warm compress for 3–5 minutes to increase blood flow.
85.Clean with alcohol; allow to dry.
86.Use a lancet (automatic, retractable). Puncture perpendicular to the skin ridges.
87.Wipe away the first drop of blood (contains tissue fluid).
88.Collect blood into a microcollection container (capillary tube or microtainer). Do not scrape the skin – let blood flow freely.
89.Apply pressure with gauze until bleeding stops.
Order of draw for capillary tubes: Blood gas (heparin) → EDTA → other additives → serum.
1.6 Blood Cultures
Collect before starting antibiotics when possible.
Use two separate venipuncture sites (e.g., left and right arms) for two sets.
Clean the site with chlorhexidine (or iodine) using a back-and-forth scrub for 30 seconds; allow to dry for 30–60 seconds. Do not touch the site after cleaning.
Inoculate the aerobic bottle first, then the anaerobic bottle.
Do not collect from an existing IV line unless ordered.
Adjust angle slightly; release tourniquet; try another site (max 2 attempts per MA)
**Clotted tube**
Inadequate inversion
Discard; redraw with proper inversion
Maximum attempts: An MA should attempt no more than two venipunctures per patient. After two failures, notify the provider or a more experienced clinician.
1.8 Specimen Handling, Labeling, and Transport
Labeling: Label tubes at the bedside with the patient's name, date of birth, date, time, and your initials. Never pre-label tubes.
Transport: Place tubes upright in a biohazard bag. Some tests require chilling (e.g., ammonia, lactic acid) or protection from light (e.g., bilirubin, vitamin B6). Know the requirements for each test.
Centrifugation: For serum or plasma, allow blood to clot for 30–60 minutes at room temperature before centrifuging (unless using SST/PST with gel).
Chain of custody: Required for forensic or legal tests (e.g., drug testing). Document every person who handled the specimen.
1.9 Patient Education and Documentation
Explain the procedure in simple terms. Warn the patient about a brief stinging sensation.
After the draw, instruct the patient to keep pressure on the site for 2–3 minutes and to avoid heavy lifting with that arm for 1 hour.
Document: date/time, site used, needle gauge, number of attempts, tubes collected, patient tolerance, and any complications.
Common Exam Traps
115.Order of draw confusion: Students often place the red tube before the light blue. The light blue (citrate) must come before any additive tubes to avoid calcium contamination. Remember: "Blue before red, but blood cultures first."
116.Tourniquet time: Leaving the tourniquet on for more than 1 minute causes hemoconcentration (falsely elevated protein, potassium, and cell counts). The exam will test this as a cause of inaccurate results.
117.First drop in capillary puncture: Many students think you collect the first drop. You must wipe it away because it contains tissue fluid and may dilute the sample.
118.Mastectomy side: The arm on the same side as a mastectomy is contraindicated due to lymphedema and infection risk. This is a classic "which arm do you use?" question.
119.Hemolysis vs. clotting: Hemolysis is caused by shaking, small needles, or forceful transfer. Clotting is caused by inadequate inversion. Students mix these two causes.
120.Needle gauge selection: The exam may ask for the best needle for a fragile vein. The answer is 23-gauge butterfly, not 21-gauge. Larger gauge (21) is for normal veins; smaller gauge (23) is for delicate veins.
121.HIPAA vs. consent: You do not need written consent for routine phlebotomy (implied consent applies), but you must explain the procedure. HIPAA governs the privacy of the test results, not the act of drawing blood.
122.Fasting tests: Students forget that glucose and lipid panels require fasting. A non-fasting glucose may still be drawn, but the result is flagged; a non-fasting lipid panel is invalid.
123.Blood culture site prep: Alcohol alone is not sufficient for blood cultures. Use chlorhexidine or iodine with a 30-second scrub. Students often pick alcohol.
124.Syncope response: The correct response is to lower the patient's head and elevate the legs, not to give them water immediately or leave them alone. The exam tests the immediate physical response.
Summary
Phlebotomy is a high-yield area on the NHA CCMA exam. Master the order of draw, tube additives, site selection, and complication management. Always apply standard precautions and OSHA Bloodborne Pathogens Standard. Remember the two-identifier rule, bedside labeling, and the maximum of two attempts. Practice the order of draw until it is automatic, and review the contraindications for each site. With this foundation, you will be prepared for phlebotomy questions on the exam and in clinical practice.